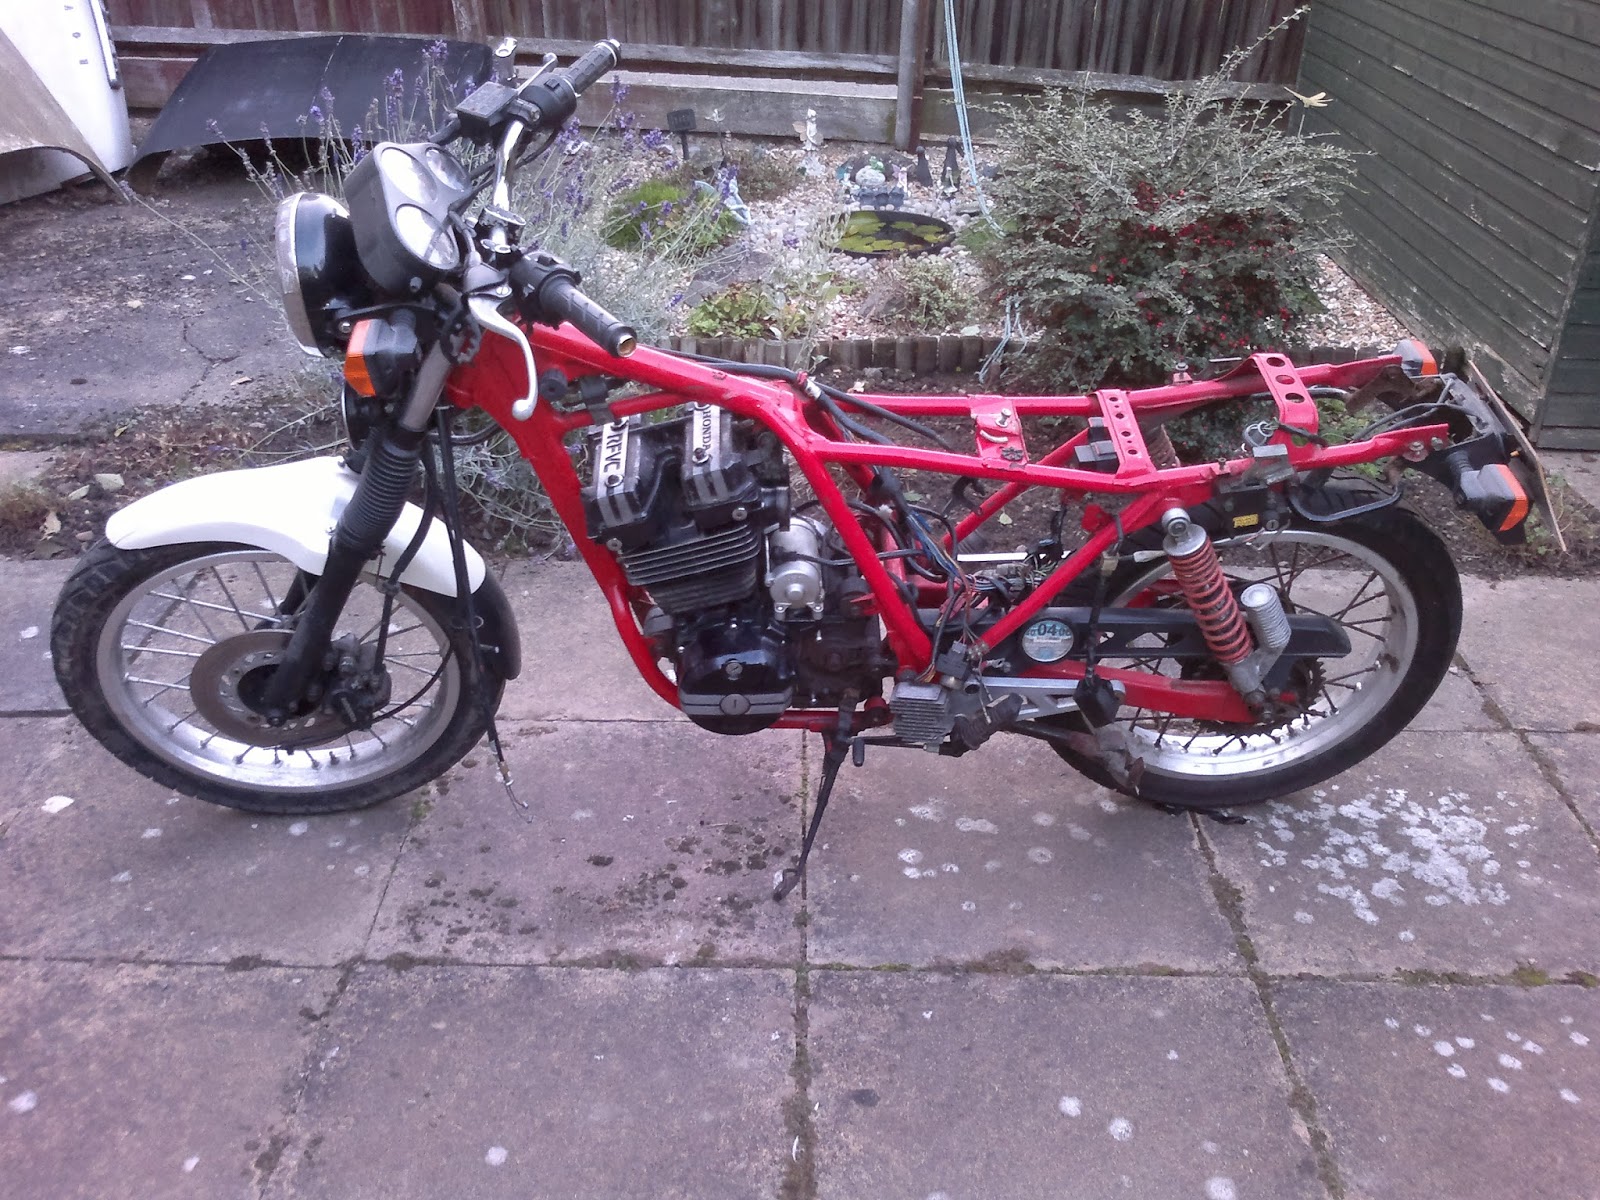
So, the tacho on your CBX250RS has stopped working, eh? All fine and then completely dead? Mine did that, this is what I found..
The manual states to try the signal feed from the coil, which was fine. Then to try the feed to the clock itself, which was fine. Here the manual stops, but my tacho was still broken.. Step 1, remove the clocks!
Step 2 - remove all the screws.
This will free the individual clocks, including the tacho. Step 3 is to check out the tacho because it's broken somehow.
Waaaiiiittt...
What's going on here.. Is that wire loose?
Yep. Made in 1983, broken in 2016 because of a poor solder joint. I guess this is out of warranty? Let me just resolder this into its hole..
The red framed CBX had been in the shed for over three years, only touched to steal its rear wheel with all straight spokes to get #1 through its MOT, and again to steal the speedo drive after #1 broke the driving tab off its own because the cable was stiff. CBX #1 is now quite properly on the road, and I am finding it a joy to ride - it has only served to vindicate my original thinking that these bikes are the pinnacle of correct, basic motorcycle design. Meanwhile the K100 and TRX850 both need serious and invasive servicing, so there's only one thing for it.. Take the easy way out and put this thing back together.
A long time ago I removed the barrel and piston from engine #2 with the knocking main, in the hope of maybe using it in this bike. I can't use the bike's original piston because it has a valve stuck in it, but maybe the barrel will be okay with its new hone marks? A quick measure suggests that's a stupid idea, as that barrel has been freshly bored to the next oversize, so I have no choice but to bolt the different barrel on. I'm not too keen on this because it does show some scoring:
I was reliably (?) informed that these marks are not terribly important as they are near the top, and perhaps the rings won't sweep past them.. I don't know, but I have no choice. The bore was also sporting a light coating of rust after sitting in the shed for three years, as were the piston rings.. I scraped off what I could, the uppy downing will take care of the rest right?? After a liberal covering of oil on both cylinder and piston, I attempted to squeeze the rings and slide the cylinder down over it.. As if. The rings eventually went in and allowed the cylinder to come past, but I have no idea if any of them broke. I don't think they did, but it's impossible to know - it's really a job for two people, one to squeeze the rings in while the other lowers the cylinder. Anyway, after a small hiatus #2 was finally being rebuilt!
I had the head refurbished by Zoom Factory in Harbury at the same time as I had the head for #1 redone. I replaced both inlet valves as they had clearly been kissing the piston, which cost £47 shipped from Econohonda in New Zealand. I also had both heads "refurbished" (ruined) by Coventry Boring And Metalling who are clearly not used to things as high tech as eighties Hondas, if they hadn't refused the workshop manual perhaps they would have had more of an idea of what to do. Half the springs were upside down, and they had attempted to lap the valves in rather than perform the correct three angle cut.. I paid £16.80 for the privilege. The work at Zoom Factory was £86.40 but it is of the highest quality, I would use them again. Despite the cylinder and piston being free as I had them sitting around, I have also needed to use a base gasket which was £4.44 from CMSNL and soon a head gasket, £10.73 again from CMS. I also had to buy a single dowel pin from ebay as I just couldn't free one more, so annoying! Anyway, I was left with a head looking like this:
You may be able to see a few marks from the valve head rattling about, left in the aluminium. These may create hot spots, but the engine is not of a particularly high tune and fuel here in the UK is a minimum of 95 RON so I doubt it'll be a problem somehow. This head had also sat at the foot of my bed since January 2013, wrapped up in its own bag.. How time flies. Not any more though, stick that head gasket on!
And then stick the head on!
This engine building lark is easy, right? Thankfully all the bolts torqued correctly, despite the aluminium threads still being full of copper grease. 50Nm still seemed more than tight enough, so I'll say it was fine. While poring over the engine, I found a bit of wire that was loose for some reason.. Someone who had rebuilt this engine before had lovingly crafted a strange loop that was meant to keep something in place, but I don't know what. It was chewed, and possibly what caused the timing to slip.. Looking around a bit more I noticed this thing, sitting behind the pulse generator:
Can't have that there, can we? Best free it..
This fits with the other part that I found. I think someone didn't trust the front tensioner blade to stay in place, so decided to try and tighten it down.. Even though the head holds it in place. If this owner is out there, reading this - please don't put bits of wire inside the engines you are building. There is no need. And please don't use copper grease on everything, it's even around the inspection cap mixed with oil so some has been washed away, lovingly swirling round all those bearings acting as a fine grinding paste.
Anyway, with the head on it's time to do the fun bit - time it up. Simply put the cam idler gear in the chain so that the lines on it are flat along the top of the head when the T mark on the flywheel lines up with the little inspection mark on the alternator casing. Easy, right? After faffing about with letting the tensioner off and skipping the chain around the teeth of this gear about six times, we finally have the marks almost straight:
They're not quite perfect but moving the chain a tooth either way would be further out, so this has to be right. I blame a slightly stretched cam chain. With that fiddly job done, fitting the cams is easy - just plonk them in, with the lines on the cams lined up with the marks on the idler gear.
These are the cams and rockers out of engine #2 with the knocking mains, by the way. In CBX #1 they make a horrible racket, as can be observed here:
I think this is probably due to the low oil pressure that engine has. Hopefully, this set of valve gear will be quiet in this engine.. It used to be, at least. Eventually, the bike looks like this:
Looks a lot healthier already, no? The rocker cover bolts don't seem to want to go into the cam holders inside, the threads come out with bits of aluminium on them but I'll worry about that some other time, along with finding a tank that doesn't leak. And rear wheel bearings. And all the wiring. Carbs next!
I'm a sucker for an eighties Honda. I'm also a sucker for singles, anything with a red frame, white bodywork or piggyback twinshocks. So imagine what happened when I saw a Japanese imported CBX250RS-E with red frame and white bodywork on ebay.. Even though the seller wouldn't say if it ran or not, I had to have it. It was mine for £280 and as sold as seen as you can ever get. It even had the original piggyback shocks, I was over the moon. The reality of what I had bought was about to set in, however.
"No idea if it runs, mate" said the seller. "Never tried" he proclaims. The story went that some bloke had left it on its side for a couple of years or so, in his garden. This was why the tank was rotten, and the lead acid Lion battery was beyond scrap. The guy I was buying it off had taken it in part exchange for something, but had no interest in fixing it up or of bikes in general. I came to believe the first part of this story, but the second is suspect.. I think he knew what was up and didn't fancy it one bit.
I hand over the money and it's thrown into the back of a van, and brought home on 16/6/2012. Initial testing reveals the engine is seized solid. I shouldn't be surprised, it had sat outside for years, but all I want is the head and valves for CBX #1 because the ones it has fitted are making suspect noises. I try and remove the plug for a look-see, but it won't shift. I mean.. It really doesn't want to know. After using the longest spanner I can find on a plug socket (!) it finally twists.. Have I snapped the plug? It continues to twist, but is very tight in a certain spot.. It's so tight that the spanner is cutting into my hand. Eventually, after a bit of sweating, I am confronted with the awful truth:
What have I got myself into? What has happened? The piston is still there, and the engine now turns a little.. Only one thing for it, get the head off. I have some idea of how this goes by now..
Wait, what? Where's.. Oh.
The eagle-eyed will notice the fresh hone marks on the bore, and that the spark plug was new. Who would go to the trouble of getting that done? And were they competent to put all this back together properly? The copper grease on the threads of the head bolts suggests not, engine oil only for that particular application. The amount of blue goo around the rocker cover seal also suggests not.
Removing the barrel reveals more bolts covered in copper grease, and this bizarre sight:
The piston looks almost new. Except it's also scrap.. The valve has punched right through, looking like this on the underside:
The lack of discolouration on this piston is astonishing, it has to be new. Comparing the bore and piston sizes to my standard items from CBX engine #2 (with the knocking main) reveals that this is actually first step oversized. Someone really put some effort into this, only to have it all go catastrophically wrong. The trip metre reads 1.2 miles, surely not..?
The amount of blue goo everywhere is of major concern, it's even around the float bowl seals. I remove the clutch cover to see what is caught in the oil pump gauze..
Please people, don't do this. Despite all this the crank seems okay, the mains don't seem to allow much uppy downy movement and the big end bearing seems sound enough, though there is a considerable amount of lateral play. No way am I getting it rebuilt, that didn't go at all well last time so I'll just patch it up and see if it works. Oh, and in the meantime I'll use the better cams and rockers this one came with in CBX #1 as that actually does things like fire and propel itself.. For now. So much for using this head on it though!
I have replaced the cams and rockers with ones with hardly any scarring from CBX #2 (details of which will come later..) and it now runs almost as quietly as it once did, albeit a bit tappy. I could tighten the clearances a bit more, but I'm still not convinced it's quite right - although I'll happily run it in now. However I have come across something that may help shed some light on the mystery.. While stripping the ruined engine for it's piston (for #2) I had a good look at the connecting rod and saw that the rod from SEP does indeed have an extra hole:
I remember wondering about it at the time but I didn't have anything else to compare it to, since I didn't have other cranks to look at or the old rod. But I wonder if oil can escape more easily from the crank then perhaps this accounts for the seemingly lower oil pressure? Do replacement rods often have new holes in? I don't really know what to make of it.
As an aside the old crank seems fine, no play on the rod up or down, so it must have only been a main bearing. Ah well!
An update! Now that the weather has warmed almost to tolerable levels (at least for the past few days) I have continued to put it all back together. I won't bore you with that again, but today was finally test ride day. I thought that the clockwork knocking noise had gone away, at least a bit, but after getting the motor hot it was back just the same as it had been before I had new valves fitted - so it wasn't the valves making the noise! It seems to run just fine though so screw it for now. Since I now have a spangly smartphone I recorded a clip of the noise (and proof that it runs!), any ideas are hugely welcome.
The noise seems to be mostly from the left exhaust area, which incidentally is furthest away from the oil feed into the rocker cover. The feeds are clear though and plenty of oil is making it to the top, so short of sticking in a tiny camera to see what's going on I cannot verify if it's getting enough oil or not. I also wonder if maybe the exposed bits of metal under the hardened layer on the cams/rockers have corroded a little and are now catching slightly. I am clutching at straws though. Whatever it is it doesn't seem to affect how the bike runs, and if it is just cam/rocker related then it's no big deal to fix later on if I do find out what it is.
My, how time flies. Some time last year I stripped it back down and took the head off and had it sitting around for a bit. Then I bought 4 new valves, two inlets from Econohonda in New Zealand and two exhausts from David Silver. I then took it all to a place called Coventry Boring and Metalling and asked them to fit the new valves and get them to seal - they said they would grind them in as needed. They also refused my offer of a workshop manual, so imagine my surprise when I got the head back and found they had reassembled it with half the valve springs upside down, apparently unaware that they are progressive. I had paid £33.60 for the privilege, too. I then took it (along with another head for another CBX250 I seem to have acquired which needed a valve seat) to Zoom Factory which is a bloke in a room, who cut the seats properly and charged me £60 for the privilege, but at least he knew what he was doing. Long story short, I hopefully have a working head and I am unemployed once more so have the time to do it. Oh hello, you!
One lovely looking head, hopefully sans knocking:
And after a bit of work..
The bolts holding the head down are supposed to be torqued to 50Nm, I got to 40 and went a bit more before wussing out. I think it'll be alright though. The carbs are also currently refusing to go back into their rubbers, even with the help of a rubber mallet - I think this must be down to how cold it is, I have a heatgun if things get desperate. I can't believe how long it's been though, crazy!
2 x inlet valves - £52.63
2 x Exhaust valves - £36
1 x Head gasket (again!) - £14.94
Zoom Factory head work: £60
Yesterday I took the bike out of the garage where noise can reverberate and gave it a little run outside. Upon closer inspection it appears that the noise is actually coming from the top, so I quickly stripped it back down and replaced the cam holder that hadn't wanted to torque down properly just in case the cam was leaping around underneath it. The new holder and it's bolts torqued down properly, but when it went back together it sounded just the same! The only thing left was tappets, so today I set them properly with care and attention. I didn't expect it to make any difference as to my mind the sound is too heavy to just be tappets, but I put it together yet again and whaddya know, it was quiet! For about a minute anyway. It's now back to being noisy but at least I know what it is, all I have to do is get those cams to fit. I guess it is possible that I have mismatched a cam lobe and it's rocker but I am fairly sure they are all back in their original places.. It didn't used to be noisy with this valvegear at all though so I don't understand why it sounds like clockwork now.
Anyway, here is the new oil pipe that runs up the outside of the engine and feeds the rocker cover, which squirts oil at the cams:
I figured it was worth paying £7.20 to be sure this pipe was clear. I also took a photo as proof that the thing does actually work, even though I have built it..
So there you go.. This bike broke almost 2 years ago with a terminal knocking sound, and it has now been repaired to the point where it only has a nasty sounding slap at the top end. I shall have to get the new cams to fit somehow, and then it's all good! Particular thanks to guru for his help taking the stupid thing apart, and qwakers for help on putting the stupid thing back together, it was always appreciated. Now to sort out a way to change gear, and get the wheels respoked, and sort out the cams, and get it MOT'd, and whatever else needs doing..
1 x oil pipe (11335-KE5-010) - £7.20
1 x new rocker cover gasket/seal - £5
Running total: 983.92 still including unused top end bits..
And so, upon further inspection, the new cams are different to the old
ones. The old ones are larger in diameter by 1mm and the bearings that
are on them have a diameter 1mm smaller.. The new cams with their larger
bearings were never going to fit. This is quite a downer, and I can't
understand how this would be the case when the new cams are a superceded
part, but they're just not going to fit without major work.
I
shall refit the old rockers and cams for now and figure something out at
a later date, at least it'll run for a bit.. It's not going to be how
I'd like it though :(
The old cams have bearings with a 20mm inner and 37mm outer diameter,
making them a normal 6904 bearing. The newer cams have bearings with a
19mm inner and 38mm outer diameter, which is not a standard size but can
be found. I did have a quick look for bearings with a 19mm inner and
37mm outer but I can't find any, though maybe they exist somewhere.. I
do wonder if they could be got from Honda as a sort of conversion kit? It is quite possible they are imperial, but I don't have anything precise enough to measure tenths of a millimetre. The bearings themselves have SC0481C3 written on them if that helps, and of course they are from NTN (or at least I think they are).
The past few days have been very busy, with the old stuff fitted back on it was time for all the other stuff to be put on - carbs, airbox, wiring, all faffed about with. I did have an issue with one of the bolts for a cam holder not torquing down properly but it seems to hold it okay. In fitting the rocker cover I came across an odd problem - the manual clearly states that the spring for the small bit of tensioner should go around the bolt, but if it were there the gasket for the cover couldn't fit..
I just curled the spring around the casting instead, it certainly looks more like where it should go. I also fitted a brand new oil pipe to feed the top end, filled the engine with oil from the head so everything at the top was sitting in a pool, and feverishly plumbed it all in. at around half nine tonight the tank was on and it was time to go.. It turned over about 6 times and gave a pop. A couple more churns and it came to life! I was happy for about 3 seconds until I noticed the odd, off beat knocking of metal on metal.. It's almost like a large version of gear chatter. My Dad reckons it's the cam chain, I reckon it's something to do with the primary drive or the clutch. More revs make it louder and more often though, whatever it is. Otherwise it runs fine, no smoke or death rattles, but this knocking is something of a let down. It doesn't even seem to leak oil!
I'll take the clutch cover back off and look for shiny bits, but I really don't know what it might be :(
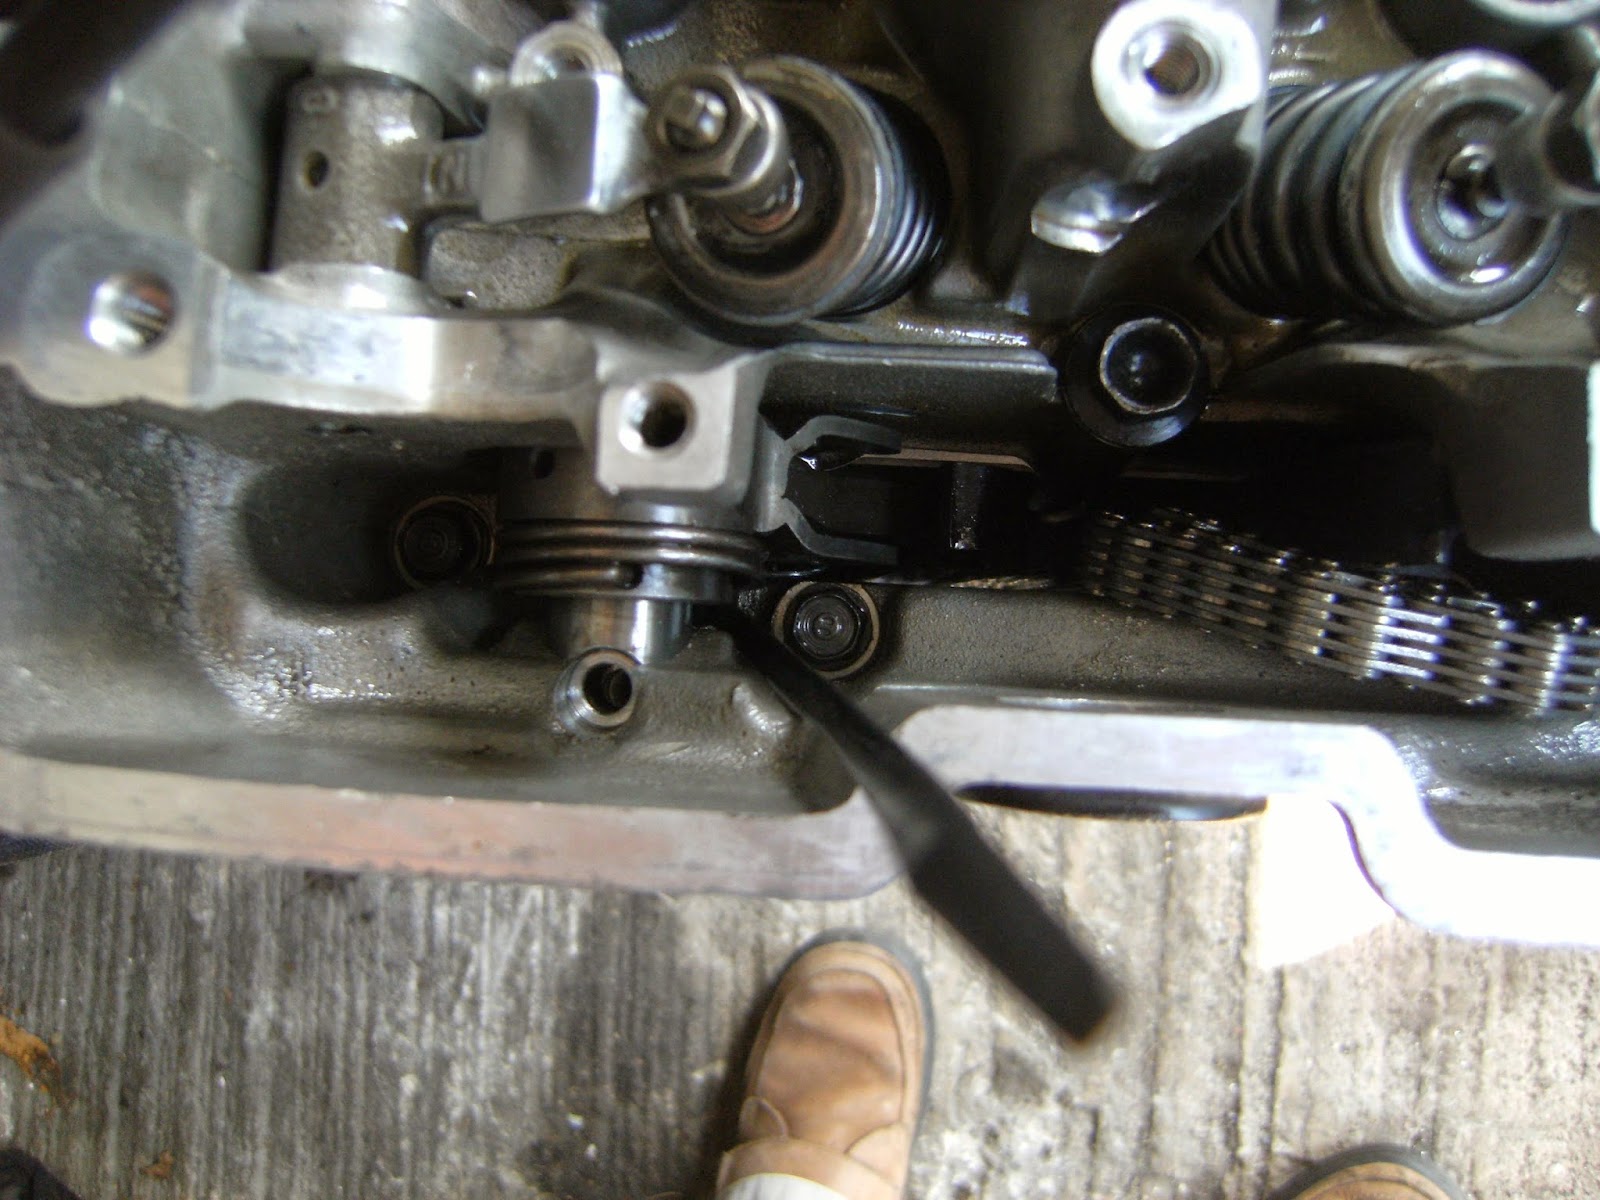
With the tensioner in place the next step was to fit the idle gear that sits in the middle and drives the two cams. With the flywheel having the "T" position at the inspection point this gear should have two lines on it showing level with the top of the head.. This took about 5 goes to get right the first time, and a couple more the second time with the tensioner properly in place. The tensioner also has to be let off by sticking something in the hole on top of it and levering it the wrong way so that the tension is taken off the chain, leaving just enough slack to get it into place. Quite a game getting it all lined up, but finally it was done..
The next step was to torque up the stuff on the bottom. All the big bits (clutch centre nut, primary drive and the flywheel bolt) were somewhat straightforward although I used a tool meant for undoing oil filters on cars to hold the flywheel in place while I did it up. The manual reckons it should be torqued to 100-120Nm which is twice as tight as the head! We got to 90Nm, then with the torque wrench set to 100Nm the filter tool snapped.. I reckon it's good enough though. I also had a problem with these 10mm bolts that hold the clutch release mechanism in place:
The manual doesn't give a torque figure for these but the usual is about 12Nm. They torqued up to 10Nm just fine, but come 12Nm one stretched and then snapped! I took the bolts out of the other engine and fitted those instead, again 10Nm was fine but with the wrench set to 12 two of them started to stretch.. I gave up there. Maybe I should buy some new ones?
Next up was the cams! They have a spring loaded sub gear on the outside to stop chatter and this had to be taken off and fitted to the new cams I have bought.. Another game laid in wait.
Taking a pair of circlip pliers to the old ones they exploded in a shower of springs and washers, I knew it was going to be fun straight away!
The manual says to simply press the springs into the troughs (or whatever you want to call them) and fit the sub gear over the top. As if! Of course the springs would ping out with nary a care in the world, in the end I put them half in and put the sub gear on top, and then twisted and pushed it into place, occasionally poking the odd misbehaving spring back into its hole. Eventually this was done, and with a bolt holding the sub gear in the same position as the cam gear (thanks to s screwdriver in the teeth and someone else tightening the bolt..) it was time to fit the new cams! Timing it up is easy, simply line up the marks..
Oddly Honda seem to have gotten the intake and exhaust sides mixed up on these markings, my other cams are the same. Save for some snapped bolts in the clutch which were easily extracted it was all going well, right until I tried to fit the cam holders. The bearings on the cams simply do not want to fit their cut outs in the head, there is a rather large gap underneath them:
I tried simply tightening the holders down, and one snapped in half! I won't be trying that again in a hurry, but it leaves me wondering what to do. Can I simply heat the head enough to let the bearings drop in? Is there a special technique for this that the manual isn't telling me about? I'm stumped!
1 x inlet camshaft (14110-KE5-010) - £70.80
1 x exhaust camshaft (14120-KE5-020) - £70.80
Time to update this before I get too far ahead and find I'm too lazy to write it all up..
The first step was to sort out the suraface of the head to try and make it clean for a good seal around the bore. A scraper just wasn't managing it so I took some 400 grit sandpaper to it, and it cleaned up really quite nicely:
The next step was to set the new head up with some rockers that aren't scored, these are the originals:
I actually consider these to be pretty good, they're in better condition than the other set and the inlets actually look good enough to be usable spares. This is a nice backup as I have the last two new inlet rockers anywhere in the world as far as I can tell. With the new rockers installed with the old tappets in place it was time for a final scrape of the barrel, fitting a head gasket and torquing the head down! I gave the large bolts a thorough wire brushing (the more wire brushing the better, it seems), coated them in oil and set myself up with a torque wrench expecting a stripped thread.. But it went smoothly! The threads seem to be in much better shape than the ones holding the barrel to the cases, but maybe I just didn't brush those bolts enough? Anyway, the head was on with smooth and shiny new rockers to boot:
Oddly the Honda workshop manual that I am using says that there should be wave washers between the rockers and the bits of head that hold them in place, but neither engine has had any. There is no play side to side either, so I can only guess Honda changed the design at the last minute. There isn't even any room for a washer of any sort.
The next step was to fit the not-yet-understood cam chain tensioner, something I had not been looking forward to. At first it plopped into place but wasn't tensioning very much, but some reading ( http://www.xrv.org.uk/forums/xr/39982-tutorial-fitting-xr600-cam-chain-tensioner.html ) showed me the error of my ways. I still didn't really know where the spring went but I tried my best, some mole grips and a cable tie producing this:
After a bit of a fight it fell into place, and as it happens the bit of the spring that sticks out goes under the pin that holds the tensioner in place. Here it is plopped in:
And, after a bit more of a fight, the pin was in too:
The cable tie was then cut off by using a small set of wire clippers and the use of mole grips. Brutal, but effective. Suddenly the chain guide was shoved into the way and everything was a lot more awkward, so it was probably right!
That is all I have pictures of so far.. More has been done, but this would be no fun without the pics.
1 x head gasket (12251-KG0-004) - £12 (already added in to the running total because I got confused earlier!)
2 x inlet rockers (14431-KL8-710) - £78 (roughly due to exchange rates from the Netherlands and New Zealand)
2 x exhaust rockers (14441-KE5-003) - £81.60 (from the Netherlands)
I attempted to some make sort of impression on the carbon that is welded to the valves with a coin but all I ended up with was a valve with a bit of coin added to it in orange streaks. My Dad saw me trying this and took a valve off me, and then proceeded to put it in his lathe and attack it with the tip of a flathead screwdriver! The graunching noises were unbearable to my mind but the valves appeared to have come through the experience unscathed, and missing all of the deposits to boot! Filled with confidence the next task was to fit the new stem seals (four 12208-413-003P, £18.96 total), which was relatively easy in the grand scheme of things although the old ones put up a bit of a fight. They simply pop on and off the top of the guide which is a bit like a barb, I was quite pleased with the progress.
Then came putting the valves back together with their springs. What a nightmare! If I ever want new springs fitting to anything again I'm getting a workshop to do it! Getting the collets or cotters or whatever you want to call them to fit back in where they should proved an impossible task by the normal route, they simply wouldn't stick in the groove that they're supposed to occupy at the top of the valve stem. Instead we (poor dad gets roped into more than he should) had to compress the springs and the valve cap quite a way down, get the collets to sit in the gap between the stem and the cap and then slowly undo the spring compressor tool to let the cap and collets slide up the stem and hopefully have it all locate into place. This was a tricky business with much frustration and use of dentistry tools, but eventually we had one done:
And then, with the experience we had gathered, the rest followed a bit more quickly..
This all took at least two hours of poking, prodding, compressing and undoing. If only my paranoia of breaking valve springs wasn't so strong! Anyway, so we now have four inner springs (14761-KE5-003, £9.60) and four outer springs (14751-KE5-003, £12) fitted and ready to go. I'll also show you how much cleaner the valves are now:
They are that clean on the back, too. I didn't bother to touch the valve seats as I have used this head and the compression seemed just fine, and frankly I have no idea at all what I am doing if I start grinding away at stuff.
I am somewhat concerned by the rust that can be seen in the top right of that picture though, it is from the previous head gasket and whilst being fairly smooth now it is still not as good as the rest. Could it affect compression if I don't clean it up to a mirror shine? I don't really want to take sandpaper to it as it'll end up being uneven, surely? And I don't really want to get it skimmed because the compression ratio is already 10.5:1 so there's not much metal to spare..