Step 1
Play some Road Rash. This will get you in the mood and hopefully give you enough enthusiasm to finish the job. You can revisit Step 1 at any time if you need a bit of a boost or to be reminded why this needs to be done. If you can't play Road Rash it is somewhat acceptable to watch the following video, but it is not a true substitute for playing the real thing:
Step 2
Sort out a way to get Soundgarden pumped into your work space. This is important for morale. Growing your hair and wearing three quarter length trousers with Doc Martens is optional but recommended.
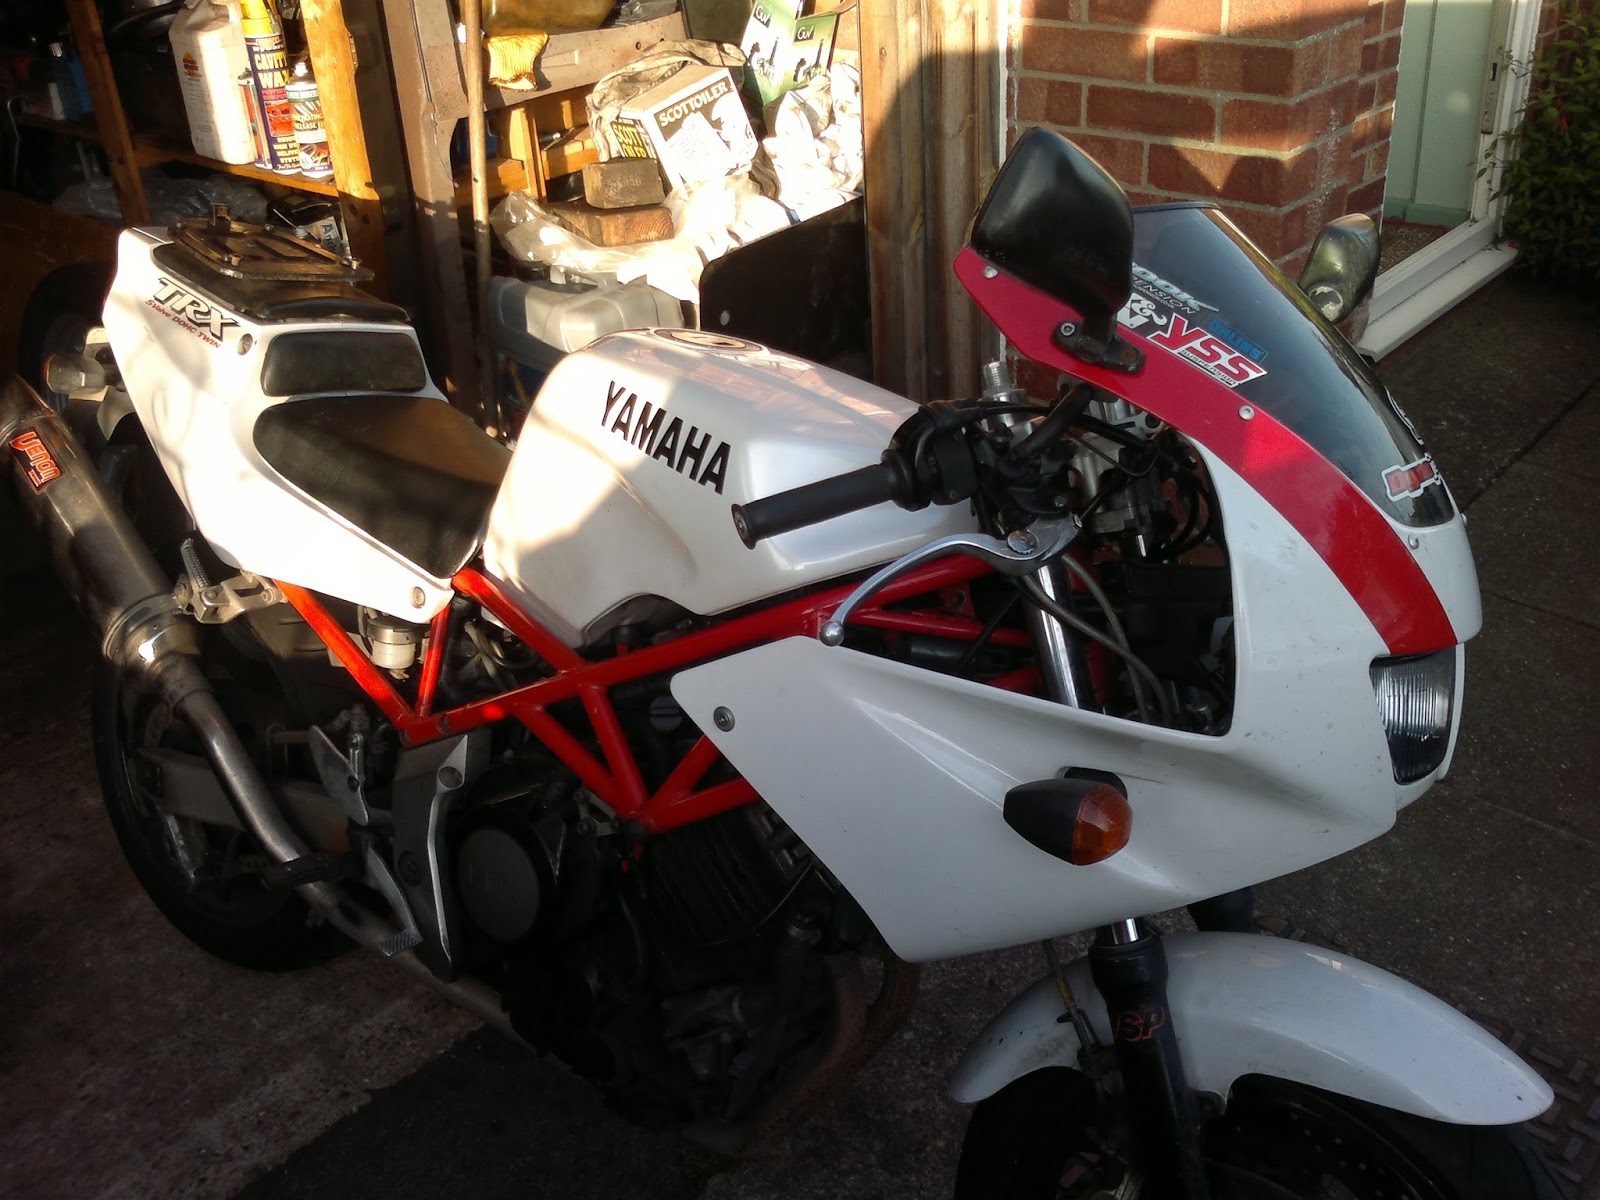
Step 3
Admire your own taste in bikes.

Step 4
Decapitate it. It's a shame but you have to break some eggs to make a reliable road bike and all that.

Step 5
You need to empty the coolant. A washing up bowl works well.

Step 6
Use the lock on the left side of the bike to unclip the passenger seat, and remove it. Then pull the hook in the uncovered compartment and unclip the rider's seat, remove that too. Then remove the two bolts at the front of the tank which hold it to the frame. Now move the clip that holds the relatively fat petrol pipe on to the stupid and unnecessary fuel pump. Don't try and remove the pipe from the fuel tap as the barb has been known to pull clean out.
At this point, with that clip squeezed together and moved along the pipe, you will need a clamp for the fuel pipe. In theory the fuel tap will not let fuel through without a vacuum on it and you should be fine, but in reality these taps do not work. Some dribble fuel constantly, some let it pour through. I have a small thumbscrew affair which is very handy for this. When the pipe is clamped, screwdriver it off the pump and then simply lift the front of the tank up. Try not to let the pipes catch on anything underneath, you are exerting a lot of turning force doing this and could damage something.
At last!

Step 7
By now you're probably well into the Superunknown album, but that's okay. Taking your time is good. The next thing in the way is the airbox - pull the small breather tube off that seems to go into the frame for reasons and try to undo the clip holding the fat crankcase breather hose onto the rocker cover. You will find the frame is in the way, best of luck not scratching it to buggery with your pliars. Pull the hose off the rocker cover and then undo the screws in the jubilee clips holding the airbox on to the carbs. A little pull and away it should come, revealing twin BDST38s, a nice sight.

Step 8
Because this stupid bike is water cooled, like a car or any decent computer, there is a stupid radiator that we have to remove before we can get to the rocker cover. Undo the little breather hose, loosen the jubilee clips, twist/break the hoses free, remove all four bolts and just pull the thing off.

Step 9
Because this stupid bike is water cooled there is a stupid thermostat that we have to remove before we can remove the rocker cover. What is the deal with water cooled motorcycles? What's it all about?
Pull the electrical connectors off the stupid thermostat and undo the screw that clamps a wire in place, then put the screw back before you lose it. You've been putting all these bolts back before you lose them, right? Then undo and remove the single allen bolt that is holding the thermostat to the frame (it's probably rusty as owt, good luck) and possibly remove the hose from the metal pipe that goes into the top of the head. You will have to remove that pipe to get the rocker cover off but it's up to you how you do it.
Simply wrestle with the thermostat, its hoses and all the wiring just above it until the thing pulls out through the hole in the front of the frame. Throw it on the grass in disgust at water cooled motorcycles.

Step 10
You could be on to the Down On The Upside album by now, fed up with how much work this project is and disheartened at the direction Soundgarden chose to take. Try not to think about either of these things because we can see a rocker cover!!


Step 11
Grab your biggest, meanest flat headed screwdriver and undo the inspection/timing/whatever plugs on the alternator cover. If some pillock really tightened these up previously then I am sorry for the way you just wiped a chunk of value off the bike by leaving big scars on the engine. Can't be helped though, blame the Japanese for sticking with that bizarre design. With the caps screwdrivered/hammered/whatevered off get a 19mm socket and a ratchet of useful length and turn the flywheel/crank anticlockwise until the T mark is next to the little notch in the small hole. This is supposed to be TDC, with the cam lobes on the left cylinder facing away from each other. if it's the compression stroke. This seems to be okay, I did quickly try with the lobe facing straight away from the bucket and the measured clearance was the same. Then turn the crank 270 degrees and measure the other set of valves.
Stick the thickest feeler gauge you can in the gap and record. To be in spec you are hoping to find the inlets are at 0.15-0.2mm and the exhausts at 0.25-0.3mm. Mine came out at this:
Step 12
Right, a quick rest from this (I had two weeks) and then straight back into it. For this next section I recommend the Dragline album by Paw, it's really good:


With the springy innards of the tensioner out the way you must do your best to undo the two allen bolts that hold the body of the tensioner in place. I used two different allen keys for this, they had the flats in different places to each other so I could use one to twist the bolt slightly then get the other one in. You need to do this because there is no room. Once again, thanks Yamaha.. Have I mentioned the valve clearances on my 1994 CB250 take 20 minutes and are tappet and locknut so can be done for free? I don't even have to take the tank off. And I don't have to do them any more often than with this thing.. Anyway, pull the tensioner out and take note of how extended it is - if it doesn't have much extension left you need a new cam chain. Have fun with that.

Step 13
Are you a fan of Paw yet? Next is to free the cams because they're in the way. Undo the bolts in a criss cross manner, a bit at a time so that the silly weak aluminium things don't warp horribly. I took the right one off first because if you remove the one next to the chain there may be a lot of leverage on the far cap, but the manual gives no pointers on how to do this so just, like, undo it. Because my exhaust valves are all in spec I only want to remove the inlet cam, which left me with this:


With your existing shims read and written down, you can try going to your local Yamaha dealer to be told they look nothing like anything they use and no they can't help you or you can just buy some off the Internet. Because mine is a #175 (1.75mm thick) and I have no clearance but I need 0.15-0.2mm I need at least a #150, maybe #145 - I won't know until I have a clearance to check.
Now is another good time to stop for a bit.
Step 14
Did you try the Yamaha shop? What a waste of time that was, eh? After a bit of searching I managed to find a #145 on ebay for £6, which is apparently a reasonable price. I still feel ripped off.


With the cam and caps all in place (including the top chain guide because two of the cap bolts hold it in place) put the tensioner back in the way it came out (I think the ratchet thing goes at the bottom?) and the big bolt into the end of the tensioner. With all this in place it is time to turn the engine over and see if it all still works - be careful! If it won't turn it is likely the chain is snagged around the crank sprocket, if you force it your engine could end up as scrap. You'll need to free it off however you can.. But thankfully this hasn't happened to me yet. Turn the engine round a few times and then measure your new clearance. Mine ended up as 0.25-0.3mm which is beyond the 0.15-0.2mm spec but I'm okay with that, it's a lot better than being tight. It does mean I needed a #150 shim though, but I'm not paying out for yet another tiny piece of metal.
If you're happy with the clearance you can carry on and put it all together, if not then you know what you have to do. Because I'm cheap I popped the rocker cover on, changed the plugs while I was there (to matching ones this time, thanks previous owner who fitted one DPR8EA-9 and one DPR7EA-9!), squeezed the thermostat back in and bolted the radiator in place. It's all so easy when you know what you're doing!

Step 15
We're close to the end now, so no real need for more nineties rock music.. Though you should give Gruntruck a listen. I took the opportunity to fit #140 main jets and new 5E185 needles with the clip in the middle position, it was easy enough to do and should make the bike run nicely. Onwards!
Pop the airbox back on with all its silly tubes:


Testing testing 1 2 3!

I've got a 3vd TDM (same things with a slightly different smell) with 87,000km on the clock and the exact same valve is getting tight.
ReplyDeleteThe exhausts are exactly in sped and I can still fit a 0.15 feeler gauge in the other inlet ones, but there's that pesky middle one that can barely fit a 0.10. I'm honestly considering leaving it like that, give that it's a whole ordeal to get everything stripped down yet again, just to check the shim size.
No, I didn't remove the cam and check it, because I'm a sissy :|
Did the valve clearances move around again?
Yes they did, at just under 38K I had to replace the head (it was cheaper than buying 6 new inlet valves!) because that one pesky valve had very quickly closed up again. Sorry for the bad news.
DeleteArgh.
DeleteI guess I'll just bite the bullet and buy one of these:
https://www.ebay.com/itm/Hot-Cams-30-Pack-Shim-Kit-5-ea-in-05-Increments-from-1-50-1-75mm-9-48mm-OD/352433368825?epid=171147616&hash=item520eaa6ef9:g:s~QAAOSwkzhbdZGp
(actually pretty good value, considering that a cheap shim goes for 2-3€ a pop)
From what I've seen, pretty much all 850 engines came with 1.75-1.80 shims from the factory, so with some monkeying I should be good.
Just another question.
Does your engine sound -how should I put it- valve tappety when running? I checked the valves in hopes of finding a loose one in there, but it's the other way around.
You can, but by the time you're down to #150 there isn't a lot left of the valve head. I fitted the #145 at 36254 miles but replaced the head with a 1997 model at 37788 because I didn't trust it. Many people have replaced their valves (or the head) at around 40K because they couldn't shim it any further. This is all with the 270 degree engine though, the 360 may well last longer.
DeleteAnd yes, mine is noisy too. At first I thought there was something wrong (cam chain??) but it seems they're all like it!
Thanks for the tips. For now I'll try shimming the thing and then check again at around 95,000kms or so. I just wish it wasn't such a pain in the ass.
DeleteI've also got a manual cam chain tensioner to try out. Some people claim that they can sometimes quiet down the mechanical noises.