Saturday 3 November 2018

A tale of a puncture

You know how it goes, you get to work one day and find a great big screw in your rear tyre.
I fretted about it for a bit but it didn't seem to be leaking so I just rode home on it, no bother. "I know" I thought, "I'll fix it wi' me plug kit! Yeahhh". The tyre is that horrible Mitas and there's bugger ll tread left on it but I don't have a replacement and I need to get to work so..
And all is well again. Okay so the first mushroom fell back inside the tyre but I lopped the end off before I blew the tyre up, the second time I blew it up and then lopped the excess off and it seemed okay. Is that normal? I can't remember, maybe it is. Confident in the mush I leave the pump and kit at home and set off on the commute in the morning.. Ohh how short my memory is. This happened previously on the CB250. About a mile from work the plug falls inside the tyre and a very quick deflation event occurs. I stuff it in the entrance to a farmer's field and walk the rest of the way, rasser frasser nasser..
I decide the only sensible course of action is to borrow (ahem) a large screw from work, turn it into the hole and push the bike all the way to Morrisons where I can blow it up at their petrol station.It's only 0.9 miles away, how hard can it be?

While I'm sweating buckets pushing it to the supermarket (okay it's pushing itself on tickover in first but it's still hard!) a bloke zips past on his Triumph, turns around at the roundabout and comes back. He has the audacity to ask if everything is okay. I point at the rear tyre. He gets off his bike, delves into his fancy Kriega bag and chucks a string-type puncture repair kit at me with instructions to just drop it back at the gatehouse at Triumph which is where he works. He then has the audacity to mention he's never had to use it.. I was conflicted. Anyway! Rasp the hole, thread the sticky rubber string dog treat thing through the eye of the needle and shove it in the hole, then lop off the excess. The result:
Many thanks also to the other man who works for Triumph who stopped his run to help me with this, he held on the front brake while I shoved into the rear tyre - it takes a surprising amount of shove but if you're on your own you may get away with just sticking the bike in 1st gear.

More pushing, 0.9 miles is sooo farrr..
The plug worked a treat, it's still blown up just fine 1.5 weeks later. I think I am converted to string repairs now, I've had the mushroom kit fail twice with plugs falling back inside the tyre and you need a pair of pliers to pull on the stem of the mush which isn't included in the kit. With the string repair you have everything, and the rubber is so sticky it's not going to just fall inside. I always expected the rubber to be messy, but it wasn't at all - the hardest bit was threading it into the eye of the needle, and that wasn't too hard.

Thanks Triumph people, anyway. I set off straight to the gatehouse where I handed the kit in, such was my enthusiasm at the time.

Z250SL caliper clear out

Get a new bike, they said. You won't have to fix it all the time, they said. Liars! I knew the brakes were sticky after the long, looong winter of 2017/18 but we also then had the best, driest summer in 2018. Nevertheless, after coming back from the annual Germany trip on the TRX I found that the Kawasaki's brakes had taken much umbrage at sitting still for so long and the bike barely rolled. Oh joy, a mere 10K on the clock and another year before it needs an MOT and here we go already.. the front caliper can be my first victim..
It didn't look too bad in there considering how well the brake was sticking on, but clearly the dust seals are being pushed out of their grooves. Of course I find it so very fun that my ancient BMW K100 has dust seals that extend with the piston, covering it all just like a caliper from a car, while this here 2016 model is the same as all the normal crap. Pluck the seals out with dentistry tools..
Lovely stuff. Scrapey scrape, grease grease, pop seals back in (they're practically new!), pop the pistons in (eventually, I wouldn't mind a bit more chamfer if you're listening out there Kawasaki!)..
The pistons slide in and out easily, just as they should. You all know the game that follows this bit.
It took so long..
What does that hairy bloke from the 90s shout, DONE DONE ON TO THE NEXT ONE? Hello rear.
This was actually disgusting, quite a lot worse than the front. No wonder it was getting difficult to spin the rear wheel by hand! Of course if it had drum brakes that wouldn't happen, they could even by hydraulic like a car and use the cast wheel as a heatsink just like Bill Fowler was banging on about way back in the 80s but never mind, here we are in 2016 with nothing changed or improved. Yay.
Look at this.
That is a pin that the pads sit on, and rattle around on, and basically bite into. What a terrible design. Thankfully it can be replaced but all the other calipers I've seen don't have this "feature". Anyway, where are those dentistry tools I was just using..
Look at what I managed to scrape out, and this doesn't include what I freed from the body of the caliper - this is just the seal grooves!
Grease the seals, pop them in, lightly grease the pistons, pop them in, put it back on the bike, play the game.. You know how it goes. The result is a bike transformed, it rolls, stops better, goes better, handles better with freer moving suspension, more economical.. Seriously can we get those hydraulic drum brakes yet, they'd be like this almost all the time. And don't tell me it'd be heavier than a caliper and great big disc.

Satisfaction/transformation rating: Super.
Engineering rating: Pathetic.

See you again next year, seal grooves.

:(

Fitting a Loobman to a Kawasaki 250SL

It's no secret that I like chain oilers, or that I'm too tight to spend out on a Scottoiler. I've had an old squeeze-and-go Loobman on my CBX250RS for many years, which impresses me with not only its simplicity but also its effective.. ness. The obvious answer was Loobman's new AB Dynamic, not as simple as the squeezy bottle but a similar price and supposedly it shouldn't cover the works car park in oil where I park up, which the squeezy one definitely does. On we go..
Time to unpack this neat little parcel!
The instructions are a bit too long and confusing, I think the squeezy version was slightly better in this regard but if you're of average intelligence like myself then you shouldn't go wrong too many times. First, thread a fat cable tie through the wirey snake thing like so:
Then inflict it upon the inside of your swingarm and secure in place, like so:
Simply snip the excess from the tie. Next bend the end of the wirey snake thing until it's kind of looking down at the sprocket, push the oil tube into the end of the delivery head and cable tie it all into place with a small cable tie.. Like so:
I chose to thread the tube underneath the cable tie that is holding the wire snake in place, if you've done it up too tight to squeeze the tube under then you'll have to think of another way! I also tied the reservoir to the pillion footpeg hanger, this gave me a nice short and vertical delivery which allows me to use gear oil (because it's thicker and doesn't fall down the tube so fast, y'see!).
The next step is to poke/burn a hole in the delivery tube - the length of tube after the hole will empty itself as you ride along, but the rest will stay in place due to the reservoir not letting any more flow out. This is what sets it apart from the squeezy bottle which was total loss once you'd sqozen the oil into the secondary reservoir. I gave up at this point and removed the chain guard, of course this being a modern bike that is manufactured in the cheapest way possible it's all one piece with the mudguard so off it all came..
With that out of the way it was easy. I used one of them oversized needle thingers, not sure what they're called. Some people use a soldering iron with a fine tip, whatever works for you.
With the tube successfully punctured just faff about a bit more putting all the muduard assembly back into place, fill it with oil and..
Success. After a few trips to work and back the chain looks lovely and oily:
Sure I have to remember to press the button on the reservoir before setting off but it's just part of the routine now. Hopefully this will cut down on all the rolling around on the floor, trying to tighten/oil my chain.

Oh by the way, Loobman themselves do state not to fill the reservoir to the top because oil will leak out the top - this is true! Not a terrible thing, but I'll just half fill it from now on..

Sunday 15 July 2018

Nankang Roadiac WF-1 review

After 10565 miles (!) it was time to replace the Michelin Pilot Road 3s that adorned the TRX, there was still some life left in them but not enough to pass an MOT and the front seemed to have become very slippery, possibly cooked at the track day at Mallory Park when I crashed it while braking in a straight line. The crash made more sense afterwards..

So, I was in need of tyres and my preference is that they are cheap. I liked the look (and name..) of the Nankang Roadiac WF-1, a search on Google showed a couple of glowing reviews from paid journos and a whole range of opinions from real people. One common thread was that these tyres wear fast, but everyone seems to be fitting them to gixxer thous and ZZR1400s so I figured they might last a little longer and a slow old TRX850. Turns out, no they didn't..

I eventually found that M&P had the correct 160/60-17 in stock so I bought a pair for £123.48, not bad for a pair of dual compound radials. That escalated to £189.48 including fitting.. The TRX has no centre stand so I opted for a ride in/ride out service, suddenly these tyres didn't seem so cheap, especially when the tread depth from new is not very much. The tyre man took the opportunity to promise me they wouldn't be a patch on the PR3s but that the front had a nice profile, but what does the tyre man know anyway. Running them at the standard 36/42PSI that all modern fat radial tyres seem to run at, I set off for an MOT and then soon a week in Germany.

Initial thoughts were that they were stiff - really stiff. I actually softened the rear suspension a bit to make it less harsh, but there was no getting away from the fact that the tyres were hard and skittered over rough ground. I figured they might soften up with use so carried on.

A jolly good time was had in Europe, but the tyres never seemed to get any softer/grippier. I can report that the grip on offer is perfectly acceptable in both dry and wet conditions, I've never had a moment with them except for very recently on a slimy, molten road surface which I don't blame them for at all. One interesting thing to report is that the rear got very hot on Belgian motorway and the rubber in the centre was actually starting to ball up and come off, even though it was raining. We came to a stop in some services and I could small hot rubber, like being at a track day.. Turned out to be me! This likely didn't help the rear's lifespan.

After a while I decided a drop in pressure might help, I'd had success with this before. I dropped the pressures until settling on 33/35, the pressures recommended in the TRX manual are 33/36 so I think this shows that the Nankangs are built on seriously old technology. Anyway, now running half flat and reacting quite viciously to white lines the bike turned in much faster and felt far more planted in corners - a trade off I was very willing to take.

Speaking of old technology, way back in the mid nineties it was quite normal to get around 4000 miles out of a pair of sporty tyres. At 4087 miles, the Nankangs look like this:

Just about into the wear markers at the back and almost touching them on the front. The front still has loads of tread depth in the centre, which is giving it quite a "pointy" profile and is making the bike flop over in a disconcerting manner. Meanwhile the central compound on the rear could be harder. I do like the way the rubber roughs up though, it makes me look like a hero!

So, in conclusion, these are actually quite good - good grip, good wet weather manners, good handling if you run them at a pressure that suits them. But they're not that cheap, and with fitting they're really not worth having over some old PR3s or whatever other touring tyres you can find for <£200 a pair. Lots of tyres are lasting 10K now and that makes these really poor value for money. Oh well, could've been worse - they could've been like those horrible Mitas MC25s!

Tuesday 3 July 2018

How to check the valve clearances of a Kawasaki Z250SL

Of course this will also work for a Ninja 250SL but I don't know how the extra plastic comes off..

So, you gets your Z250SL:
And you remove the rear seat. You do this by putting the key into the lock underneath the rear seat on the left side of the bike:
And turn it until the rear seat pops up. Then pull the seat rearwards. Suddenly, it'll be off! The next step is to remove the "boomerang" bits of plastic from the rear. Yes I know you're trying to check the valve clearances but Kawasaki apparently design things arse about face so here we are playing with the fairings at the very rear of the bike.. Undo these screws:
And then unclip all the clips, maybe undo some screws on the underside if your bike still has them (mine are long gone) and pull the barbs out of their grommets at the front of this piece of ever-so-useful plastic. Suddenly, it'll be off!
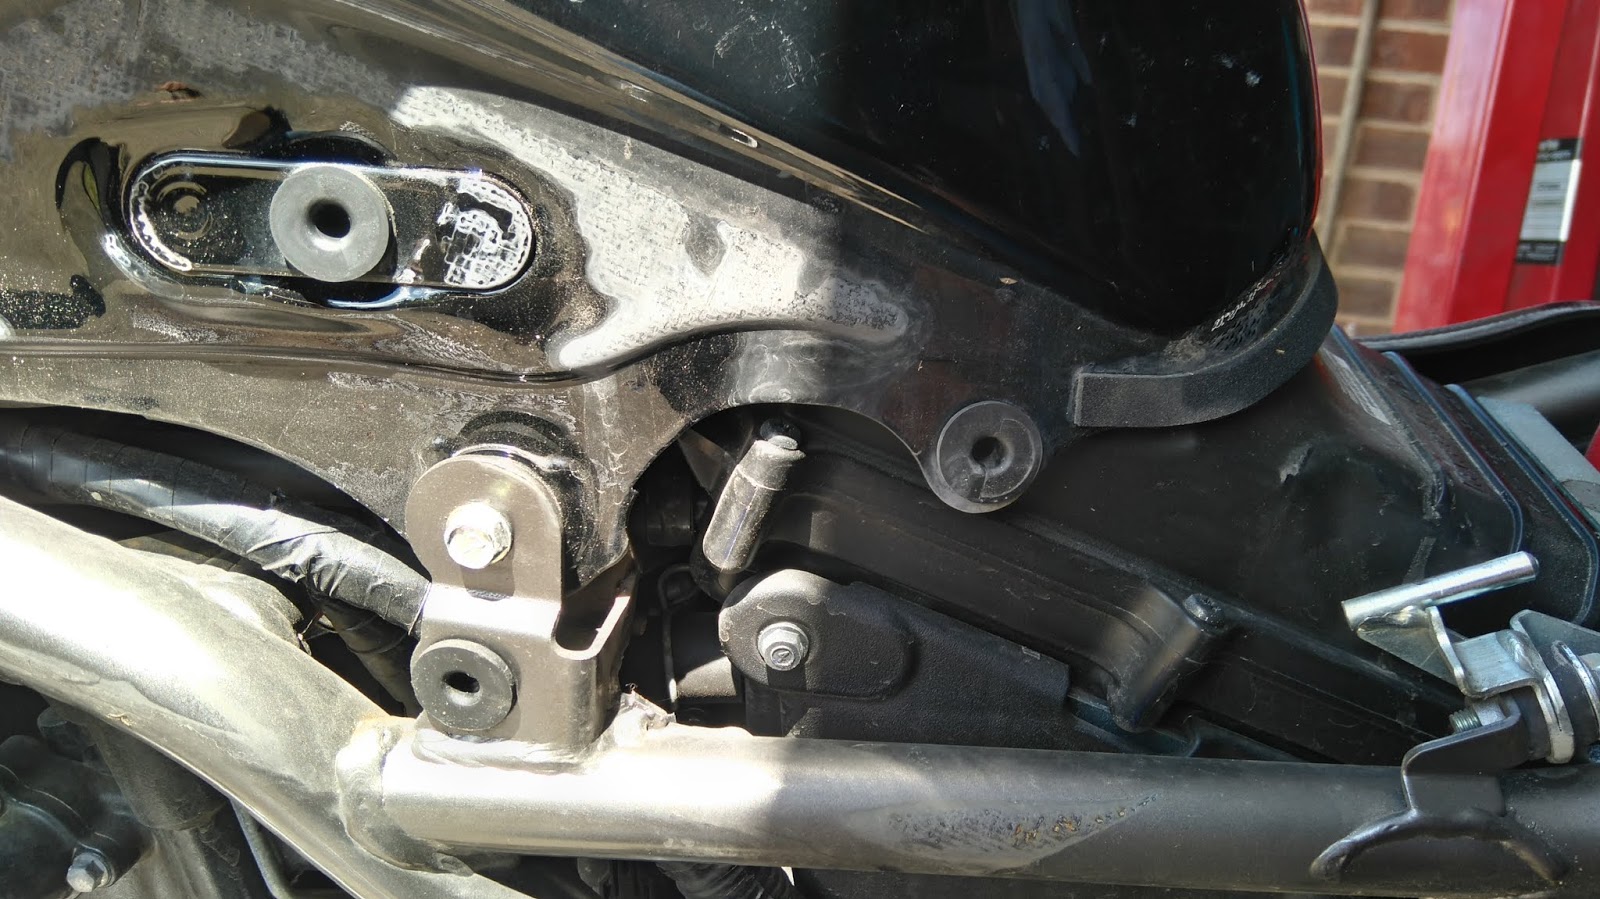
The next step is to remove the rider's seat. To the rear of the most forward grommet in the above picture is a shiny silver bit with a "7" 10mm bolt in the bottom, undo the bolt and remove it all. This is a pin that holds the rider's seat in place - remove the one on the other side too. Hello gubbins!
Either side of the battery is an interesting hook thing that connects the big stupid side plastic to the stupid rear plastic:
Unhook them.

Next up is the big stupid side plastic bit thing. This is actually quite easy to remove, it is just barbs everywhere except at the very front where it is a push fit onto a rubber thing. Barbs and grommets:
Rubber hook thing on the front of the tank:
Hole for rubber hook thing at the front of the long stupid plastic thing:
I hope this makes sense? Essentially, starting from the rear of the long plastic bit of nonsense, you just pull the plastic away from the bike until you reach the front when you pull the whole plastic thing rearwards. It is easy and mercifully the plastic is bendy so you probably won't break it.

Phew! Next up is to remove the tank. Of course the 250SL is fuel injected so this isn't easy at all.. Remove the bolts from the mounts at the rear of the tank:
You now need to disconnect the power cable from the fuel pump. This is located on the underside of the tank so lift the rear of the tank upwards to squeeze your hand in. You need to squeeze this clip together and then it will let go, mine was thankfully not difficult.
Here is a picture of the connector disconnected so you can hopefully figure out which bit to squeeze to release it (hint: the left bit):
The next joyous part of this experience is to remove the "quick release" fuel hose connector from the pump. Bloody "quick release", this took me ages. This is what you're dealing with:
You will need to pull the green side parts downwards with your fingers, this is stiff and quite painful ("quick release"!). Do not just try and pull it off the pump, the manual states the pump body is made of resin and is as fragile as your Gran after a heavy night out. Here is a picture of the "quick release" removed so you can see what state it needs to be in to let go:
This will try and leak petrol everywhere so, err, be ready for it I guess? The manual says you should have disconnected the battery but ain't nobody got time fo' dat.

The next stage of removing the tank is to pull the breather hoses off the front left. This was actually really bloody awkward and difficult as Kawasaki have used those silly wire clip things to hold the hoses in place. I ended up having to keep the tank lifted up like this:
While I attacked the clips with a small screwdriver, bending them open. I did not put them back upon reassembly, the hoses are a snug fit and they're just breathers fer chrissakes.
With the tank finally cut from its tendrils simply lift the rear and slide the tank backwards - it has some prongs at the front which fit into some rubbers. I imagine these will fall to bits in time but never mind that now.

With the tank removed, place it on some wooden blocks so that no pressure is applied to the ridiculously fragile pump housing. Oh, did I not mention you needed blocks before now? I'm just going by what the manual says.. (grumble!).
The manual also says to open the tank cap so as to reduce leakage. I don't know if this works or not but I followed the advice.

So, finally, the engine is found. Undo the clip that holds the breather (?) tube on to the air box:
Now undo the two 12mm bolts and single 14mm bolt that hold that central "spine" of the frame in place, and remove it. Also pull the breather tube that you disconnected forward, underneath the top of the frame and route it somewhere out of the way like so:
It is now actually time to touch the engine! That rear seat seems like an awful long time ago..

Simply undo the four bolts that hold the rocker cover in place and remove them, this is a totally traditional design.
Once free, the rocker cover simply pulls backwards out of the space. Note that you will have to separate the rubber gasket/seal from the rocker cover as it is too thick to fit through the gap with that rubber still in place. Sadly this makes reassembly much more fiddly than it needed to be but don't blame me, blame Kawasaki.
The manual states that the spark plug cap needs to be removed but I didn't find it to be in the way at all. I also couldn't get it to budge at all so that was a good thing, in a way.

Next up is to get the rear wheel off the ground somehow. Those of you with more money than sense may have a proper stand, I prefer to use a trolley jack underneath the rear suspension arm linkage triangle thing.
Turn the rear wheel in the direction of forward travel while pulling the gear lever upwards until the bike is in 6th gear. Now keep turning/knocking the wheel in the same direction to turn the engine over - you want the inlet and exhaust cam lobes to be pointing away from each other, this is Top Dead Centre on the compression stroke. Never mind removing the timing cap and searching for TDC on there, ain't nobody got time fo' dat.
There is a good chance that the motor stopped just before TDC on the compression stroke so you probably won't have to turn the wheel very much.

With the motor in this state it is time to check the clearances. Get your feeler gauges and feel away!
The clearance specs are as follows:
Inlet: 0.10-0.19mm
Exhaust: 0.15-0.24mm

This is the same as the KLX250 so no great surprises. At around 8400 miles my clearances were:
Left inlet: ~0.15mm
Right inlet: 0.10-0.15mm
Both exhausts: 0.15-0.20mm (closer to 0.20mm)

So mine are in spec, but the right inlet is tighter than I would like which means I'll be in there again at the next service interval plus a bit because I'm lazy. Interesting fact, the owners manual states the interval for this is 7200 miles but the workshop manual says 7600 - I prefer the latter!

If any of your clearances are out of spec then please leave a comment below including the gap you found and the mileage/kilometrage of the engine. Thankfully mine were okay so installation is the reverse of removal, kind of. Be careful not to trap/crush the rubber seal under the rocker cover, and you can use some gasket goo over the cam half moon things though I never bother and have never suffered leaks. My seal played nice and went back without much bother though I did have to poke it in with a small screwdriver in one place. Otherwise, simply reassemble..
Simply push the green section of the "quick release" connector back into place, mine took a bit of wiggling and then suddenly snapped in, and slather some grease/petroleum jelly on the barbs on the plastics, maybe some more in the rubbers that hold the front of the tank, and job's a good 'un. Phew!