Seriously, if you are the previous owner who did this then keep away from all bikes forever. Yuck!
Anyway, this CBX appears to suffer from a similar airbox issue to CBX #1 in that the air box to carburettor tubes have gone so hard that they won't fit back on the carbs, let alone seal around them. Back to the silicone hose man in Bagworth for another couple of lengths, and some McAlpine RWW3 rubber plumbing washers from a place on the Internet called Partridges, plus an hour or so with a craft knife and..
Nice innit? Yes they are supposed to be different lengths, and yes I know that silicone shouldn't be anywhere near fuel because it'll melt but what more can I do? Run pod filters? No thanks.
Next step is to put it all together, so start by connecting the throttle cables to the carbs while they are free and you can still get your hands around them. If you fit them to the inlet manifold then you'll find this difficult task near impossible.
And then simply squeeze the carbs into their rubbers on the head. "Simply". After much heaving and definitely not at all resorting to levering the things in with two big screwdrivers..
Phew! That'll do for now, maybe time for another little break..
Right, back to this. I left off back in October with the engine mostly together but needing some new cam caps and the clutch cover needing to go back on. Back in May I bought a head off ebay which was complete with cams and caps for a trifling £65, so I am now rich with spares. I replaced these two caps:
Because whoever the moron was who built this engine last time had tried to force a bolt with the wrong thread down the hole that holds the rocker cover on top. All four are a bit mashed but the correct bolts at least go down into the other two holes. Behold!
That's better. I then decided to clean out the oil strainer and clutch cover of metal and blue hermatite. I knew the goo problem was bad but it turned out to be really, really bad. Here is some of it below the rocker cover:
I think I scooped about that much again out of the clutch cover. There was also a bit of bearing cage hiding under the strainer, which is somewhat disconcerting when I have no real idea of the history of this engine other than it has had a hard life. The bearings are/were small though, possibly cam bearings or maybe gearbox. I also found a few pieces of bent wire, I think these are from the one way sprag clutch that forms part of the cam chain tensioner mechanism - the whole thing must've imploded. While checking everything over I also replaced the made up, solid allen bolt that is supposed to be the oil feed for the idle gear for the cam drives with the correct bolt with a hole right down it - this explained the poor condition of the inside of that gear! I later found the old bolt had been used as a frame fastener, the previous owner must have been a class A berk.
With the cam caps now properly in place I could turn the engine over for the first time - a 23mm socket on the crank/primary drive nut did the job. Thankfully it turns smoothly, with nothing obviously grinding or things hitting other things. I then put a spark plug in the hole and went for it.. It sucks and blows! Total success. Though I did find the plug cap to be decidedly knackered..
Buoyed by new found enthusiasm I turned my attention to the clutch cover. First I pulled off the gasket which had more hermatite on both sides, and scraped off the remnants of the original gasket and the rest of the goo. I then washed the spiders and a disturbing amount of grey metal sludge from the cover with a bucket of water. Then I left it in the shed to dry out.. Until October. You know how these things go.
With the Germany trip in September out of the way it was time to pick this back up. Doesn't it look great already?
A bit more gasket/sludge cleaning and scraping and the engine is ready to be buttoned up. I used the old allen bolts from the previous rebuild because these shiny things that have been put in by the previous owner are horrible, already trying to round out.
I took the cam cover off again to fill the engine with oil from the top - always do this after a rebuild, you need oil up there. I then removed the cap on the alternator cover and churned the engine over anti clockwise until oil spewed from the dowel near where the carbs will go - at least it pumps! Cam cover back on and the engine work is finished, until I start it and maybe find all the crank bearings are shagged. Right, time to put it all together then..
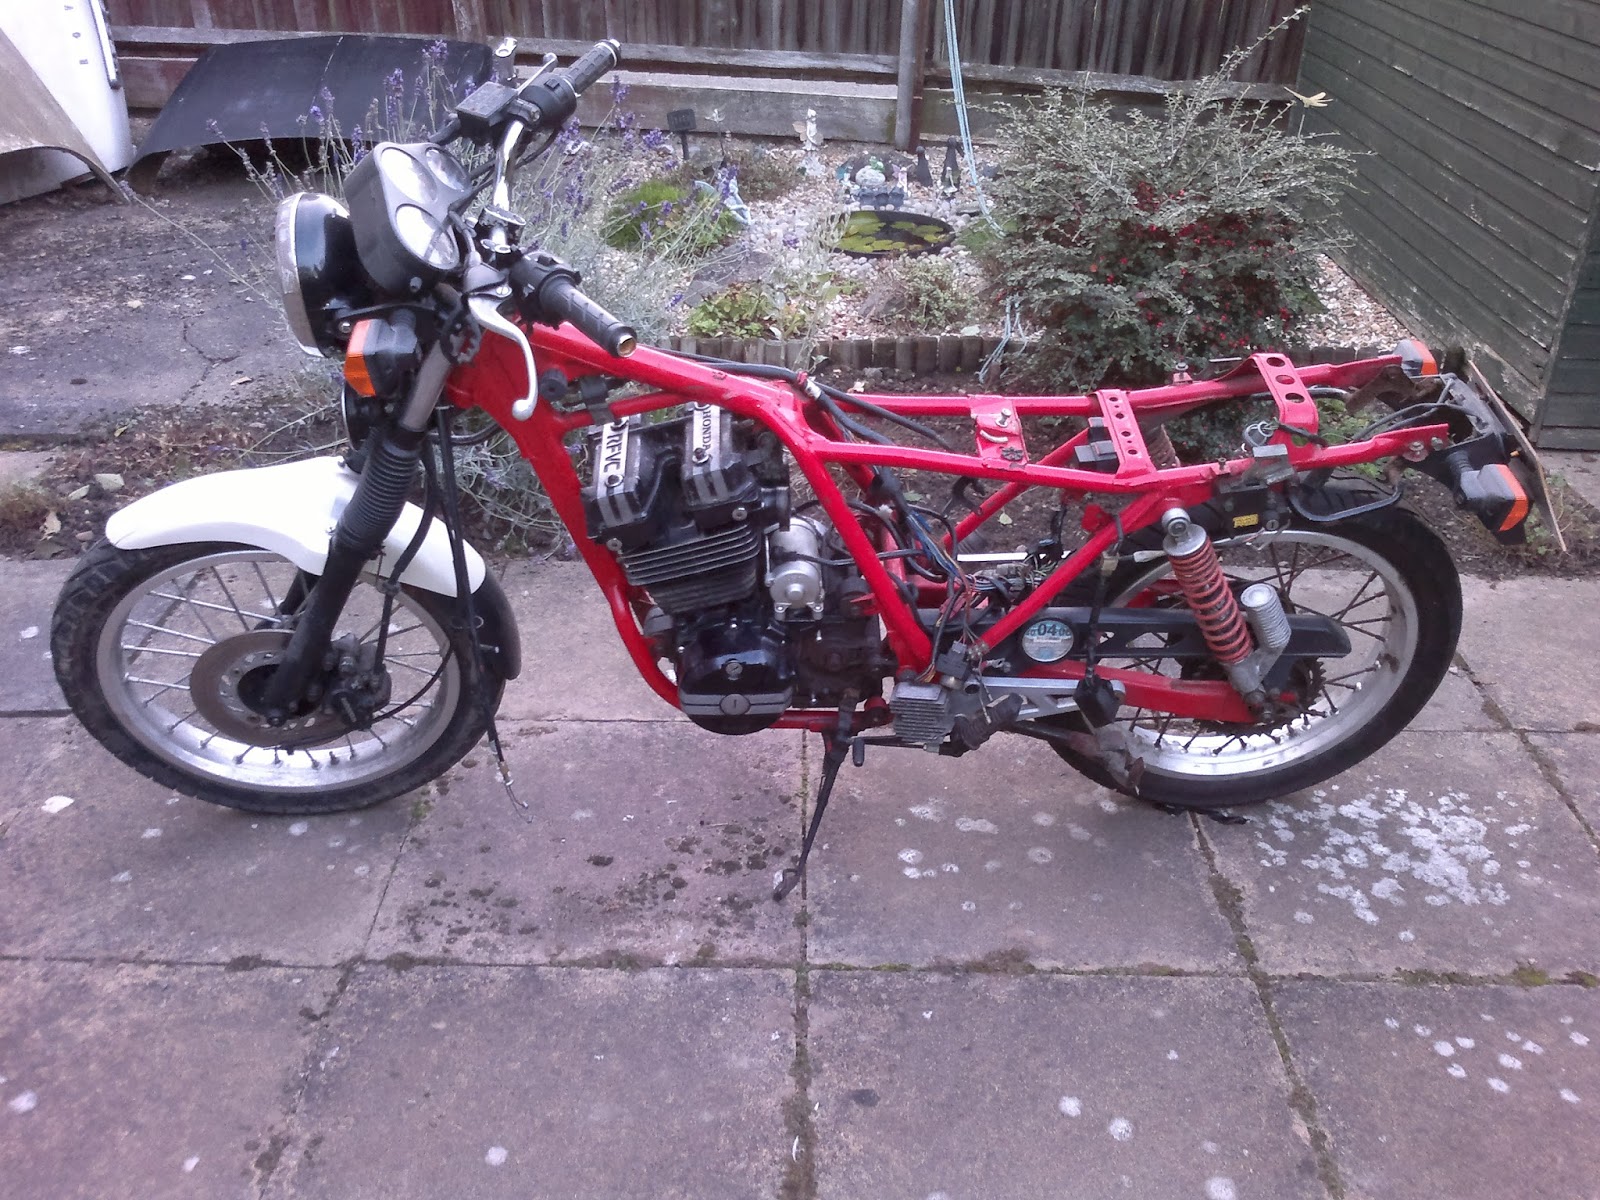
The red framed CBX had been in the shed for over three years, only touched to steal its rear wheel with all straight spokes to get #1 through its MOT, and again to steal the speedo drive after #1 broke the driving tab off its own because the cable was stiff. CBX #1 is now quite properly on the road, and I am finding it a joy to ride - it has only served to vindicate my original thinking that these bikes are the pinnacle of correct, basic motorcycle design. Meanwhile the K100 and TRX850 both need serious and invasive servicing, so there's only one thing for it.. Take the easy way out and put this thing back together.
A long time ago I removed the barrel and piston from engine #2 with the knocking main, in the hope of maybe using it in this bike. I can't use the bike's original piston because it has a valve stuck in it, but maybe the barrel will be okay with its new hone marks? A quick measure suggests that's a stupid idea, as that barrel has been freshly bored to the next oversize, so I have no choice but to bolt the different barrel on. I'm not too keen on this because it does show some scoring:
I was reliably (?) informed that these marks are not terribly important as they are near the top, and perhaps the rings won't sweep past them.. I don't know, but I have no choice. The bore was also sporting a light coating of rust after sitting in the shed for three years, as were the piston rings.. I scraped off what I could, the uppy downing will take care of the rest right?? After a liberal covering of oil on both cylinder and piston, I attempted to squeeze the rings and slide the cylinder down over it.. As if. The rings eventually went in and allowed the cylinder to come past, but I have no idea if any of them broke. I don't think they did, but it's impossible to know - it's really a job for two people, one to squeeze the rings in while the other lowers the cylinder. Anyway, after a small hiatus #2 was finally being rebuilt!
I had the head refurbished by Zoom Factory in Harbury at the same time as I had the head for #1 redone. I replaced both inlet valves as they had clearly been kissing the piston, which cost £47 shipped from Econohonda in New Zealand. I also had both heads "refurbished" (ruined) by Coventry Boring And Metalling who are clearly not used to things as high tech as eighties Hondas, if they hadn't refused the workshop manual perhaps they would have had more of an idea of what to do. Half the springs were upside down, and they had attempted to lap the valves in rather than perform the correct three angle cut.. I paid £16.80 for the privilege. The work at Zoom Factory was £86.40 but it is of the highest quality, I would use them again. Despite the cylinder and piston being free as I had them sitting around, I have also needed to use a base gasket which was £4.44 from CMSNL and soon a head gasket, £10.73 again from CMS. I also had to buy a single dowel pin from ebay as I just couldn't free one more, so annoying! Anyway, I was left with a head looking like this:
You may be able to see a few marks from the valve head rattling about, left in the aluminium. These may create hot spots, but the engine is not of a particularly high tune and fuel here in the UK is a minimum of 95 RON so I doubt it'll be a problem somehow. This head had also sat at the foot of my bed since January 2013, wrapped up in its own bag.. How time flies. Not any more though, stick that head gasket on!
And then stick the head on!
This engine building lark is easy, right? Thankfully all the bolts torqued correctly, despite the aluminium threads still being full of copper grease. 50Nm still seemed more than tight enough, so I'll say it was fine. While poring over the engine, I found a bit of wire that was loose for some reason.. Someone who had rebuilt this engine before had lovingly crafted a strange loop that was meant to keep something in place, but I don't know what. It was chewed, and possibly what caused the timing to slip.. Looking around a bit more I noticed this thing, sitting behind the pulse generator:
Can't have that there, can we? Best free it..
This fits with the other part that I found. I think someone didn't trust the front tensioner blade to stay in place, so decided to try and tighten it down.. Even though the head holds it in place. If this owner is out there, reading this - please don't put bits of wire inside the engines you are building. There is no need. And please don't use copper grease on everything, it's even around the inspection cap mixed with oil so some has been washed away, lovingly swirling round all those bearings acting as a fine grinding paste.
Anyway, with the head on it's time to do the fun bit - time it up. Simply put the cam idler gear in the chain so that the lines on it are flat along the top of the head when the T mark on the flywheel lines up with the little inspection mark on the alternator casing. Easy, right? After faffing about with letting the tensioner off and skipping the chain around the teeth of this gear about six times, we finally have the marks almost straight:
They're not quite perfect but moving the chain a tooth either way would be further out, so this has to be right. I blame a slightly stretched cam chain. With that fiddly job done, fitting the cams is easy - just plonk them in, with the lines on the cams lined up with the marks on the idler gear.
These are the cams and rockers out of engine #2 with the knocking mains, by the way. In CBX #1 they make a horrible racket, as can be observed here:
I think this is probably due to the low oil pressure that engine has. Hopefully, this set of valve gear will be quiet in this engine.. It used to be, at least. Eventually, the bike looks like this:
Looks a lot healthier already, no? The rocker cover bolts don't seem to want to go into the cam holders inside, the threads come out with bits of aluminium on them but I'll worry about that some other time, along with finding a tank that doesn't leak. And rear wheel bearings. And all the wiring. Carbs next!
I'm a sucker for an eighties Honda. I'm also a sucker for singles, anything with a red frame, white bodywork or piggyback twinshocks. So imagine what happened when I saw a Japanese imported CBX250RS-E with red frame and white bodywork on ebay.. Even though the seller wouldn't say if it ran or not, I had to have it. It was mine for £280 and as sold as seen as you can ever get. It even had the original piggyback shocks, I was over the moon. The reality of what I had bought was about to set in, however.
"No idea if it runs, mate" said the seller. "Never tried" he proclaims. The story went that some bloke had left it on its side for a couple of years or so, in his garden. This was why the tank was rotten, and the lead acid Lion battery was beyond scrap. The guy I was buying it off had taken it in part exchange for something, but had no interest in fixing it up or of bikes in general. I came to believe the first part of this story, but the second is suspect.. I think he knew what was up and didn't fancy it one bit.
I hand over the money and it's thrown into the back of a van, and brought home on 16/6/2012. Initial testing reveals the engine is seized solid. I shouldn't be surprised, it had sat outside for years, but all I want is the head and valves for CBX #1 because the ones it has fitted are making suspect noises. I try and remove the plug for a look-see, but it won't shift. I mean.. It really doesn't want to know. After using the longest spanner I can find on a plug socket (!) it finally twists.. Have I snapped the plug? It continues to twist, but is very tight in a certain spot.. It's so tight that the spanner is cutting into my hand. Eventually, after a bit of sweating, I am confronted with the awful truth:
What have I got myself into? What has happened? The piston is still there, and the engine now turns a little.. Only one thing for it, get the head off. I have some idea of how this goes by now..
Wait, what? Where's.. Oh.
The eagle-eyed will notice the fresh hone marks on the bore, and that the spark plug was new. Who would go to the trouble of getting that done? And were they competent to put all this back together properly? The copper grease on the threads of the head bolts suggests not, engine oil only for that particular application. The amount of blue goo around the rocker cover seal also suggests not.
Removing the barrel reveals more bolts covered in copper grease, and this bizarre sight:
The piston looks almost new. Except it's also scrap.. The valve has punched right through, looking like this on the underside:
The lack of discolouration on this piston is astonishing, it has to be new. Comparing the bore and piston sizes to my standard items from CBX engine #2 (with the knocking main) reveals that this is actually first step oversized. Someone really put some effort into this, only to have it all go catastrophically wrong. The trip metre reads 1.2 miles, surely not..?
The amount of blue goo everywhere is of major concern, it's even around the float bowl seals. I remove the clutch cover to see what is caught in the oil pump gauze..
Please people, don't do this. Despite all this the crank seems okay, the mains don't seem to allow much uppy downy movement and the big end bearing seems sound enough, though there is a considerable amount of lateral play. No way am I getting it rebuilt, that didn't go at all well last time so I'll just patch it up and see if it works. Oh, and in the meantime I'll use the better cams and rockers this one came with in CBX #1 as that actually does things like fire and propel itself.. For now. So much for using this head on it though!